


.svg)
Webflow is a popular no-code tool that allows you to design and develop websites visually. However, there may come a time when you need to export your site’s code. Whether it’s for backup purposes, to hand over to a client, or to host the site elsewhere, understanding how to export your Webflow code can be incredibly beneficial. In this guide, I’ll walk you through the process of exporting your Webflow and explore both native and custom methods to ensure you get the most out of your export.
Exporting Webflow site using native method will cost you because export won't work unless you have active site plan or workspace plan. And custom export method will be free but it comes with some caveats and difficulties, which we'll explain later though the article.
Why Export Your Webflow Site Code?
Backup
Keeping a backup of your work is always a good practice. Exporting your Webflow code ensures you have a copy of your site that you can restore or use independently if needed.
External Hosting
While Webflow offers its hosting, you might prefer hosting your site on all platforms like Vercel, AWS, or Netlify. Exporting the code allows you to deploy your site on any host you choose.
Client Transfer
If you develop websites for clients, they may request a copy of the site’s code. Exporting allows them to have full ownership and control over their site.
Customization
Exporting your code can provide greater flexibility in customizing your site. You can tweak the HTML, CSS, and JavaScript files directly, adding features or making adjustments that might not be possible within Webflow’s interface.
Learning Opportunity
For those looking to learn more about web development, exporting your Webflow code can be an educational experience. You can see how Webflow translates your designs into code and use that knowledge to improve your skills.
Steps to Export Your Webflow Site Code
First and foremost, we have to mention that you have to have site plan or workspace plan in order to be able to perform export.
Exporting your Webflow code is straightforward and can be done in a few simple steps:
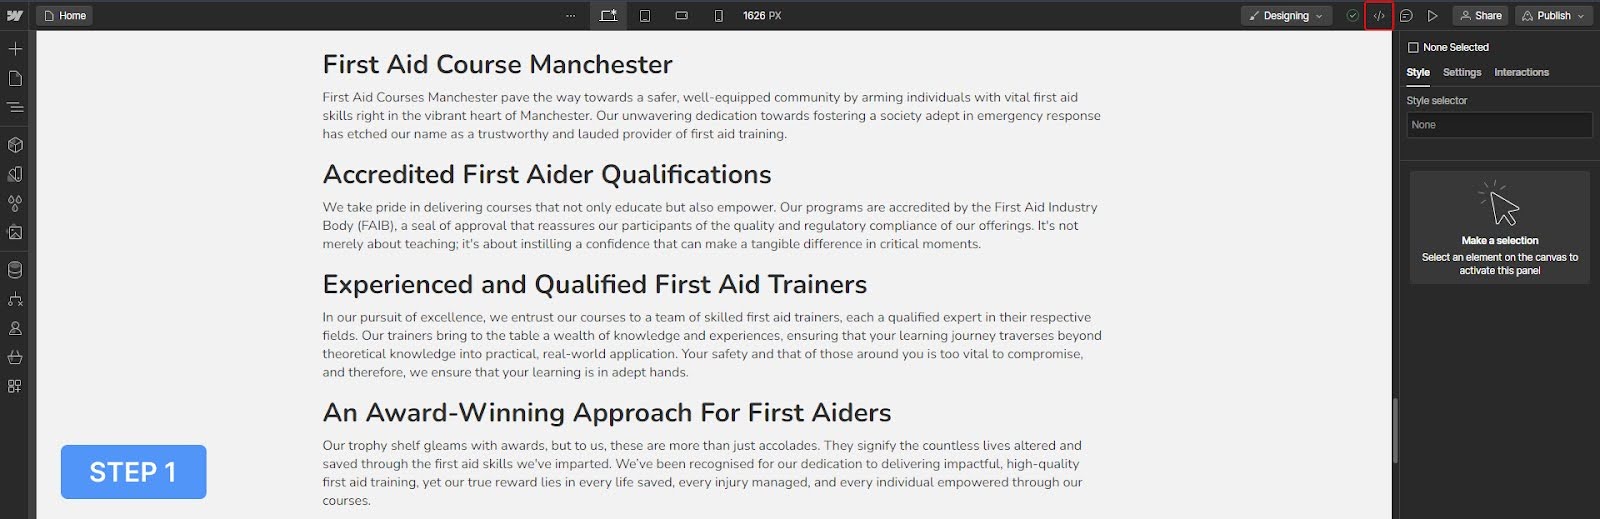
- Open Your Project: Log in to Webflow and open the project you want to export.
- Go to Designer: Navigate to the Designer view.
- Click on Export Code: Find the export icon (top-right corner) and click on it.
- Prepare Zip: Click on the "Prepare ZIP" button.
- Download the ZIP File: Once the preparation is complete, download the ZIP file.
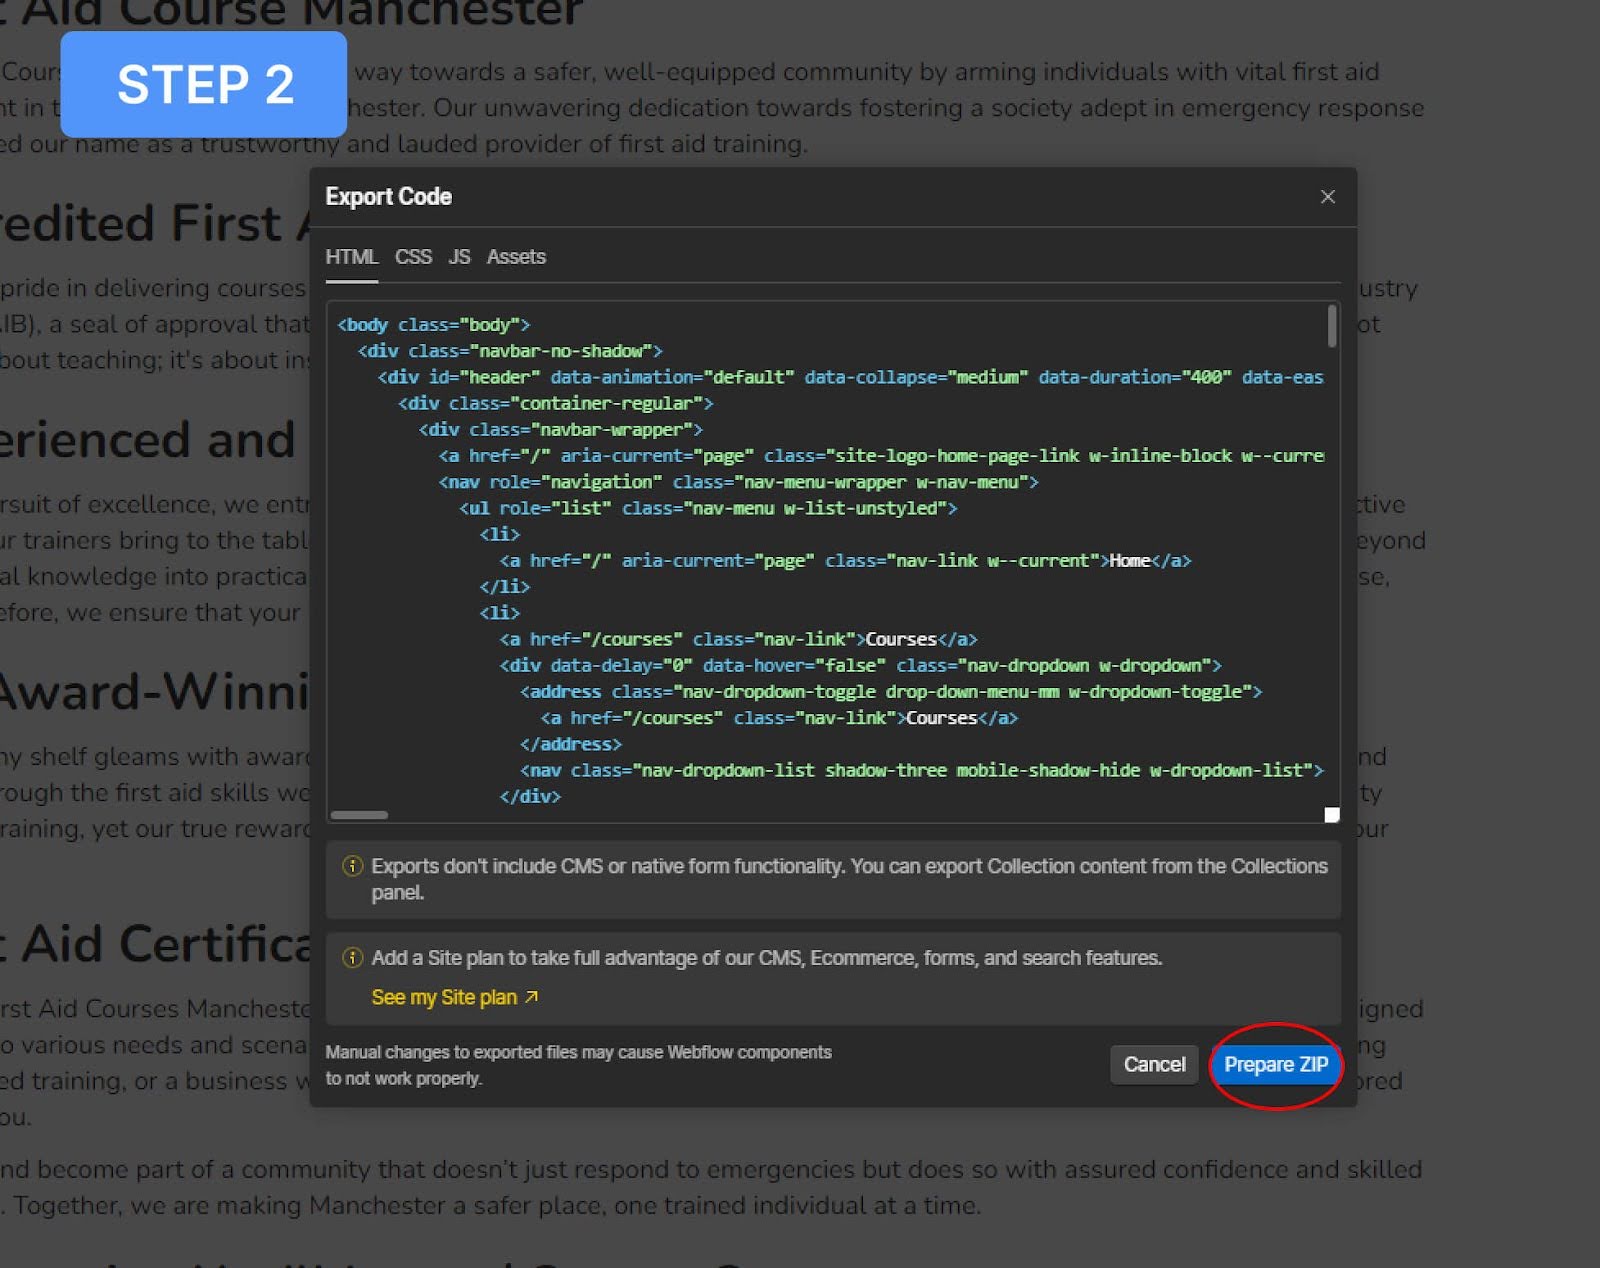
Your ZIP file will contain the HTML, CSS, JavaScript, and all associated assets of your site.
What’s Included in the Export?
When you export your Webflow site, the ZIP file will include:
- HTML Files: These are the static pages of your site, including collection template pages without the dynamic content.
- CSS Files: The stylesheets that define the appearance of your site.
- JavaScript Files: The Webflow.js file, which includes all the interactive elements and animations.
- Images Folder: Contains all the images uploaded to your site’s asset manager.

What's Not Included?
Certain dynamic features that rely on Webflow’s servers and APIs will not be included in your export:
- CMS Content: Dynamic content managed through Webflow’s CMS will not be exported.
- Ecommerce Data: Products, orders, and other ecommerce data are excluded.
- Forms: Webflow’s form-handling features won’t be included, so you’ll need to set up your form processing.
- Site Search: The search functionality that relies on Webflow’s API won’t work outside of Webflow.
- Logic Flows: Custom logic or interactions created using Webflow’s logic tools are not included.
Exporting CMS and Ecommerce Data
Although CMS and ecommerce data aren’t included in the code export, you can export this data separately in CSV format:
- Export Collections: Go to the Collections tab in the Designer, choose the collection you want to export, and click "Export."
- Save the CSV: This will download a CSV file containing all the items from the selected collection.

Custom Methods for Exporting Webflow Website
.png)

.png)


.png)
.png)